If your back is tired from pulling weeds and your water bill makes you wince, you’ve probably thought about combining drip irrigation with landscape fabric. Sounds like a match made in garden heaven, right? Quick answer: yes, you can run drip irrigation tubing under the fabric—but whether you should depends on your goals and what headaches you want to avoid later.
Let’s get real: landscape fabric blocks most weeds and keeps the soil moist by limiting evaporation. Meanwhile, drip irrigation delivers water right to your plants’ roots, no wasted spray, no wet leaves. That combo seems almost too good. But the devil’s in the details. If you bury your drip lines completely under the fabric, fixing leaks or clogged emitters means peeling the fabric back—total hassle during peak season.
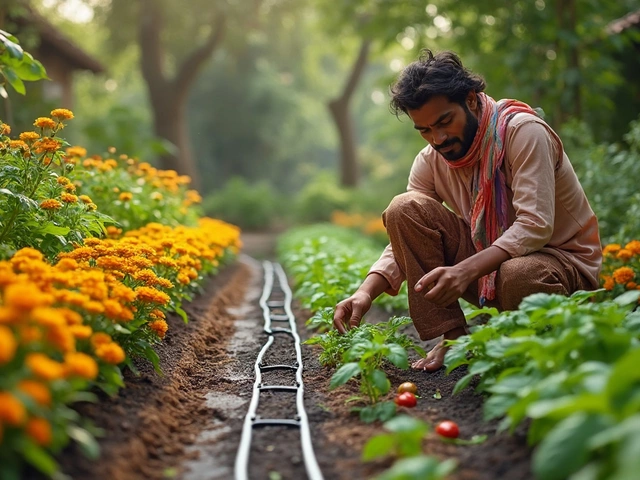
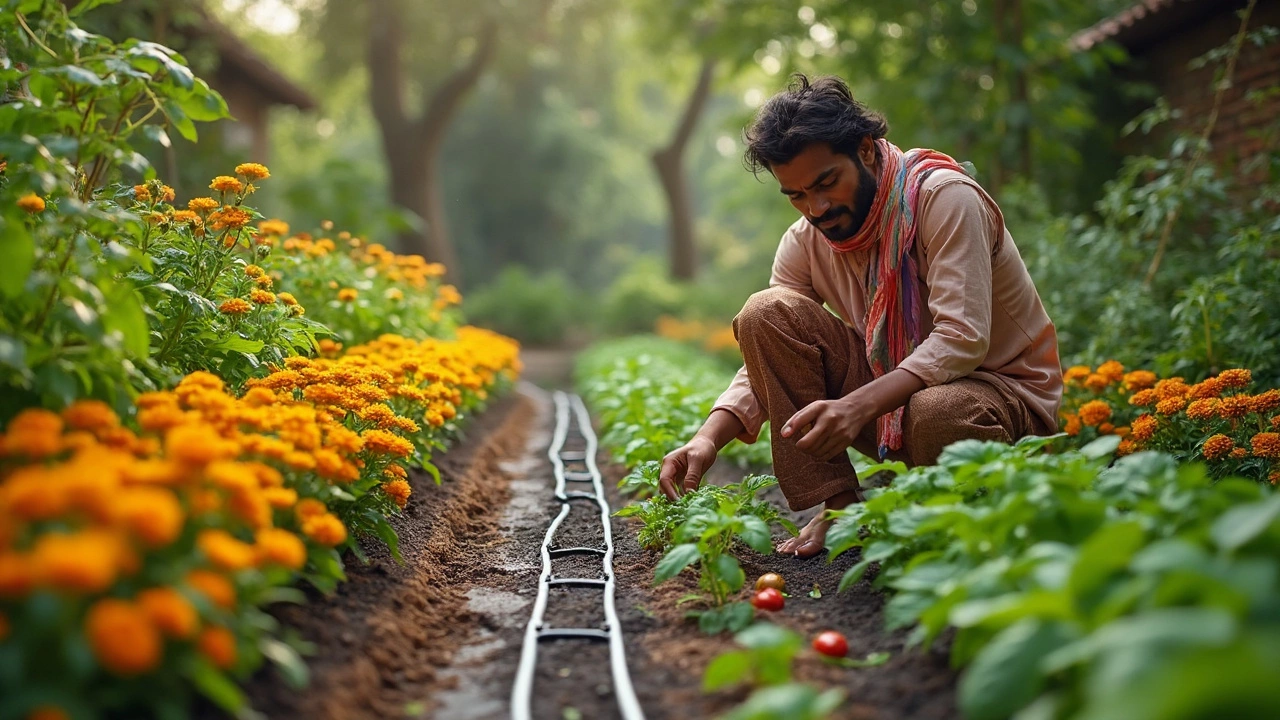
Want to keep things simple? Try running your mainline and emitters just under the fabric, but poke holes for the emitters or drip points to ‘peek out’ near each plant. This way, you’ll control weeds, save water, and still reach your drip system if something goes wrong. It doesn’t take expert skills either. All you need is basic tubing, a hole punch, and a plan for where your plants go.
- Why Mix Drip Irrigation and Landscape Fabric?
- Benefits and Drawbacks: The Honest Truth
- Tips for Easy Installation and Maintenance
- Common Mistakes to Dodge
- What Gardeners Say: Real Experiences
Why Mix Drip Irrigation and Landscape Fabric?
Here’s the deal: when you combine drip irrigation with landscape fabric, you get the best of both worlds—efficient watering and weed control. Drip irrigation delivers water exactly where plants need it, right at the root zone, which means less evaporation and less runoff. Landscape fabric, on the other hand, blocks sunlight so weeds can’t get started, and also helps the soil stay moist longer.
This combo is especially handy if you’re tired of spending your weekends after work yanking out weeds, or if you live somewhere that’s always on the edge of a drought. It’s not just about convenience—running your irrigation under fabric keeps water from splashing on leaves, which can reduce plant diseases. Plus, soil under the fabric stays cooler and doesn’t form a hard crust as quickly.
- Water Savings: Drip irrigation systems use 30-50% less water compared to sprinklers, especially when combined with landscape fabric that keeps the soil moist.
- Better Weed Control: Fewer weeds spring up because the fabric blocks light while still letting air and water reach the soil.
- Plant Health: Less water on leaves and between rows lowers the risk of plant diseases and stops weed seeds from getting what they need to sprout.
- Low Maintenance: Once installed, this setup can save hours on weeding and water management all season long.
Check out these quick stats for perspective:
| System | Water Use (Gallons per Square Foot/Season) | Weed Growth (Relative) |
|---|---|---|
| Drip + Fabric | 12-18 | Very Low |
| Drip Only | 16-25 | Moderate |
| Sprinklers | 27-35 | High |
Bottom line? If you want to save water, slash your weeding time, and help your plants thrive, mixing drip irrigation and landscape fabric is a smart move. It’s all about targeting what your plants need, and blocking out the stuff you (and your garden) don’t want.
Benefits and Drawbacks: The Honest Truth
Let’s be straight: putting drip irrigation under landscape fabric isn’t a perfect solution, but it does have some solid perks. If you hate weeds popping up everywhere, this combo will save you a ton of time. The fabric smothers weeds before they even get started, and with drip irrigation tucked underneath, water hits right where plants need it, so no wasted spray feeding stubborn weeds.
Here’s another win—less water lost to evaporation. Especially in dry, sunny spots, covering the ground cuts down on how much water escapes into thin air. If you track your water bill or care about conservation, this setup can make a real difference. In gardens that use drip irrigation plus fabric, soil moisture usually stays more even, so plants get less stressed.
But it’s not all rosy. Clogs in your line? Leaks or broken emitters? You’ll need to lift or cut the fabric to fix anything, which means more work than designs where tubes stay on top. Over time, cheap fabric can rip or shift, tearing up your nice straight rows of tubing. And if you want to add or move plants around, uncovering the system turns into a mini excavation job.
- Pro: Blocks weeds, reduces time spent on garden chores.
- Pro: Saves water and keeps soil consistently moist.
- Pro: Keeps irrigation out of the sun, so plastic lines last longer.
- Con: Makes repairs and changes trickier—expect to get dirty if you need to access the system.
- Con: If emitters get clogged, roots might miss out before you notice there’s a problem.
- Con: Badly placed fabric can trap too much moisture, which sometimes attracts pests or mold.
Curious how much water you can actually save? Check this out:
| Watering Method | Evaporation Loss | Estimated Water Use (per season) |
|---|---|---|
| Sprinklers | Up to 50% | 800 gallons |
| Drip irrigation under fabric | 10-15% | 400 gallons |
If you want more control and enjoy less fuss, some people choose to run their main tubing under the fabric but keep emitters out in the open. In the end, the best setup depends on how much time you want to spend fiddling with your drip irrigation compared to pulling weeds and chasing leaks. Just know what you’re trading for convenience.
Tips for Easy Installation and Maintenance
Setting up drip irrigation with landscape fabric doesn’t have to turn into a weekend-long headache. If you lay things out with a little care up front, you’ll spend less time fixing problems and more time enjoying your garden.
Start by rolling out your landscape fabric and securing it with sturdy garden pegs. Plan where each drip irrigation line needs to run. Most folks run the main tubing just under or right on top of the soil, then lay the fabric over it. Next, measure and poke holes through the fabric only where your emitters will water your plants. This keeps water waste down and helps your system target the root zone. Avoid letting emitters spray anywhere but at the base of each plant—that’s where you’ll get the most bang for your buck.
Here are a few quick steps that make things smoother:
- Unroll your main drip line along rows or planting beds before putting down fabric.
- Use a marker or stakes to flag where each plant sits—that’s where you want your drip points or emitters.
- Slice an X or small hole in the fabric right above each plant. Feed your emitter through so it sits at the soil surface or just under the mulch.
- Secure any tubing or drip tape with garden staples every few feet so it doesn’t wiggle around.
- If possible, leave access points or flaps in the fabric for regular checks. Some gardeners use Velcro strips or clever folds to make checking for leaks less annoying.
Clogged emitters happen—blame hard water and mineral buildup. Every three or four weeks, check each emitter while the water’s running. If one spits or drips slowly, pop it out and soak it in vinegar to dissolve gunk. For bigger jobs, you can flush the whole line: open the end cap and run the water full blast for a minute. That simple step can extend your drip irrigation system’s life by years.
Don’t forget about critters. Squirrels and rabbits sometimes chew through exposed lines. Run drip tubing right under the fabric to discourage this. And label your setup on a notepad or phone, so you don’t lose track of what’s buried where. You’ll thank yourself next spring when it’s time to add new plants or change your garden layout.
Check out this cheat table for quick reference:
| Step | Why It Matters |
|---|---|
| Plan layout and plant spots | Prevents wasted time and water, keeps system tidy |
| Punch holes just for emitters | Maximizes water efficiency and weed control |
| Check emitters monthly | Stops blockages before they stress your plants |
| Flush lines regularly | Keeps mineral buildup from ruining your system |
| Keep notes or diagram | Makes future tweaks or repairs a breeze |
Common Mistakes to Dodge
It’s easy to mess up when dealing with drip irrigation and landscape fabric. Some go all in, thinking they’re saving time, but end up with a hot mess under their mulch. If you know the common pitfalls, you skip a lot of headaches down the road.
- Completely covering emitters: Don’t bury every part of your system under landscape fabric. When emitters are totally covered, clogs happen more often, and leaks turn into guesswork. Leave access points at each plant or group of plants.
- Wrong emitter placement: Putting the drip emitter too far from the plant or not lining up your outlets with existing holes in the fabric? You basically waste water, and roots stay thirsty. Plan your holes and emitter spots before setting the fabric down, not after.
- Forgetting maintenance access: Picture crawling around, yanking up weeds, just to check for clogs. That’s what happens if you run your entire drip irrigation system underneath the fabric. Keep some lines above or use flaps so you can reach problem spots fast.
- Skipping filters: Even in clean city water, tiny stuff can get stuck in drip lines. A decent filter keeps emitters flowing. This step matters even more if you’re using well water or recycled water.
- No pressure regulator: Drip systems are happiest with less pressure. If you skip a pressure regulator, water can blast out in spots, bust fittings, or erode soil under the fabric. Most drip emitters want 20–30 PSI.
Here’s a quick-o overview of top mistakes and their outcomes:
| Mistake | What Happens |
|---|---|
| Covering emitters | Hard to find clogs or leaks, poor watering |
| No access planning | Fabric tears, more work fixing issues |
| Skipping filter | Clogged emitters, uneven watering |
| Wrong emitter location | Plants wilt or rot, water waste |
Saves a ton of time just getting these details right the first time. And trust me, nobody wants to crawl around in the heat, lifting fabric every summer to check for leaks or blocked drippers. A little planning up front with your drip irrigation and landscape fabric means less stress and better watering all season.

What Gardeners Say: Real Experiences
Scroll through any garden forum and you’ll see real-world stories about mixing drip irrigation with landscape fabric. People are not shy about what worked—and what was a total pain.
Lisa from northern California swears by putting her drip irrigation lines under landscape fabric in her veggie beds. She claims her tomato plants have fewer weeds and her water bill went down by 20% over one summer. She only had to poke small holes in the fabric where the plants went and ran all the tubing underneath.
On the flip side, Mike out in Arizona ran into problems. His emitters got clogged mid-season. Since everything was under landscape fabric, he had to pull half of it up just to find the blocked spot. He now runs his main drip line under the fabric but leaves a bit of tubing exposed right by each plant. When something goes wrong, it’s easy to check or swap out an emitter—no backbreaking fabric peeling required.
Real-life tip from a Texas gardener: if you have hard water, check your emitters every few weeks, especially if they're under fabric. Hot weather can bake the lines, and calcium buildup seems worse when you can’t spot leaks or puddles on the surface.
How about some quick numbers? Here’s what a few home gardeners shared in a poll on GardenWeb last season:
| Setup | Satisfaction Rate | Main Complaint |
|---|---|---|
| Drip under fabric, emitters under fabric | 65% | Hard to fix clogs |
| Drip under fabric, emitters above fabric | 84% | More exposed lines, but easy to maintain |
Yeah, exposed lines aren’t pretty, but the ease of repair wins for most folks. It saves time and a ton of frustration. You dodged those endless weeds, your plants get precise water, and—if you're smart about your setup—you won’t dread doing maintenance.