Topsoil Calculator
Enter your garden bed dimensions and we'll calculate the exact amounts of each ingredient you need based on the 50% soil, 30% compost, 20% sand ratio recommended in the article.
Important: Use coarse sand (not fine sand) and well-rotted compost (at least 6 months old) for best results. Avoid peat moss and fresh manure.
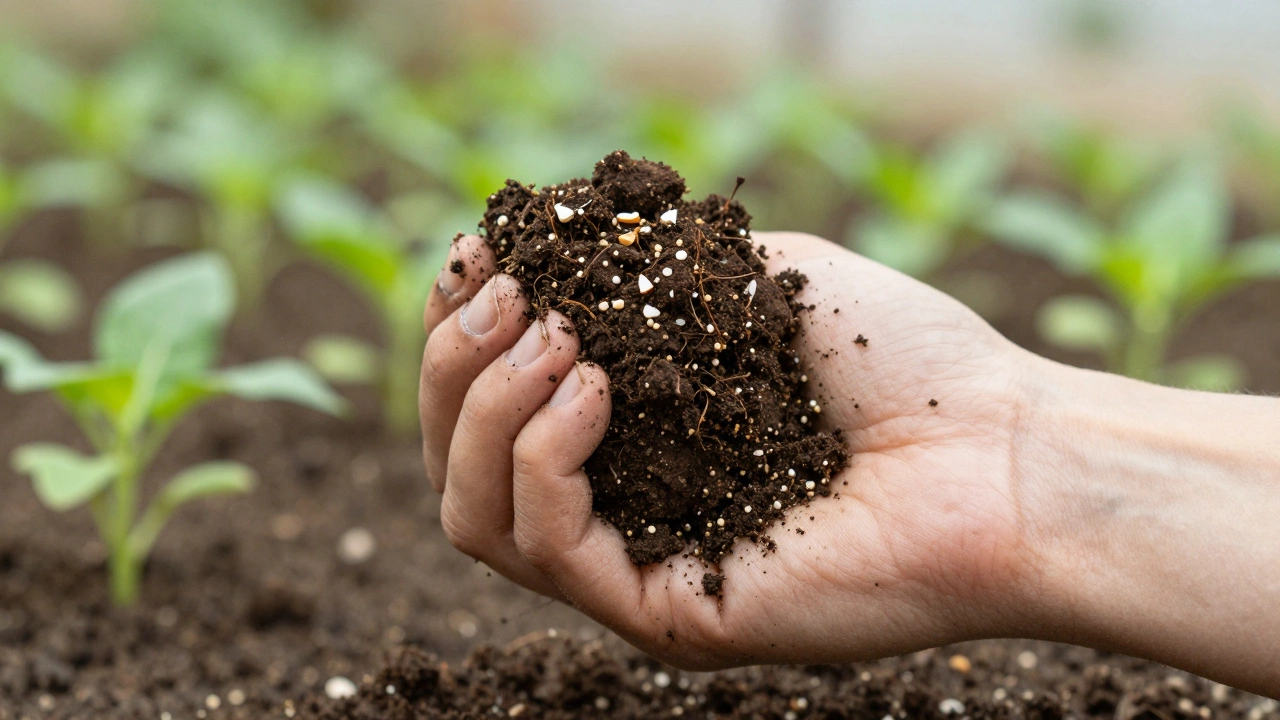
Most gardeners buy topsoil without thinking twice. But store-bought topsoil can be expensive, inconsistent, and sometimes full of weeds or chemicals. If you’ve ever dug into a bag only to find clumps of clay, chunks of wood, or worse-plastic bits-you know the frustration. The truth? You don’t need to buy it. You can make your own topsoil, right in your backyard, using things you already have. And it’ll be better than anything you’ll find at the garden center.
What exactly is topsoil?
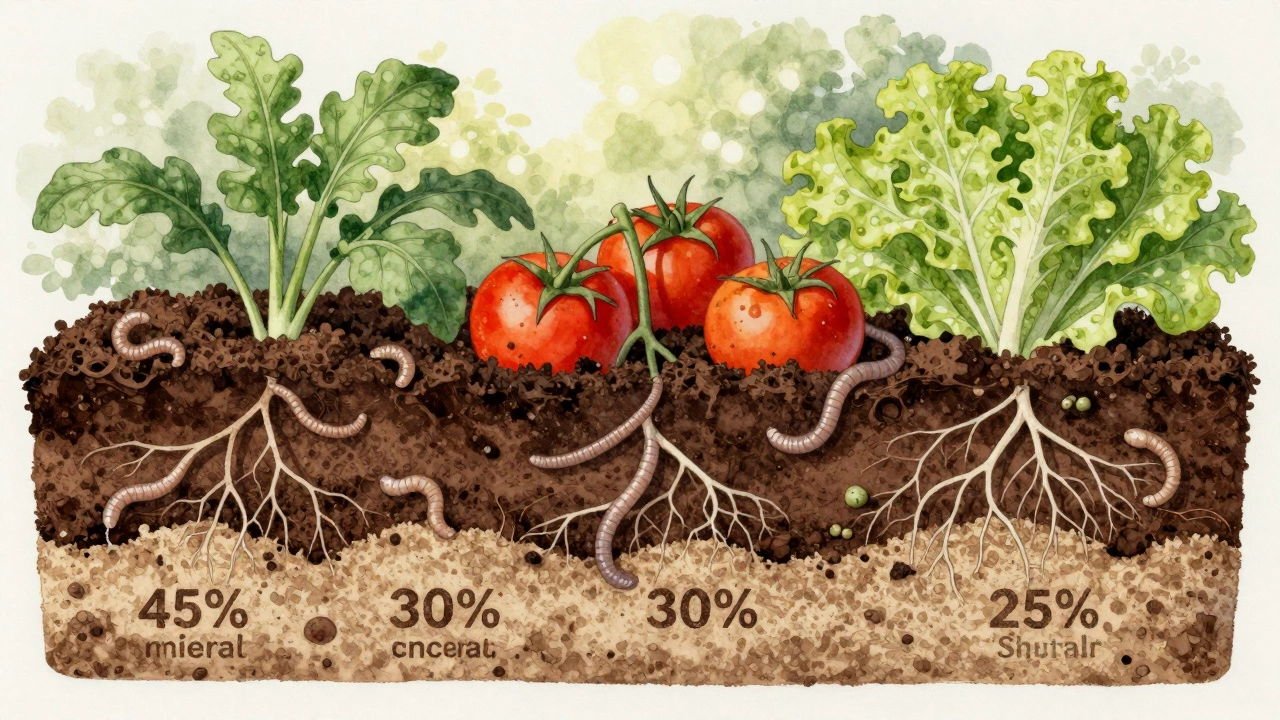
Topsoil isn’t just dirt. It’s the top 2 to 8 inches of earth where most plant roots grow and where microbes, worms, and nutrients live. Good topsoil is dark, crumbly, smells earthy, and holds moisture without turning to mud. It’s not pure sand, not pure clay, and not pure compost. It’s a balance: about 45% minerals, 5% organic matter, 25% water, and 25% air. That’s the sweet spot.
Most commercial topsoil is just dug-up subsoil with a little compost mixed in-barely better than dirt. Real topsoil takes time to form naturally. But you can speed up the process by mixing the right ingredients in the right ratios.
What you need to make your own topsoil
You don’t need fancy tools. Just three core ingredients:
- Screened garden soil (or subsoil you’ve dug up)
- Well-rotted compost (at least 6 months old)
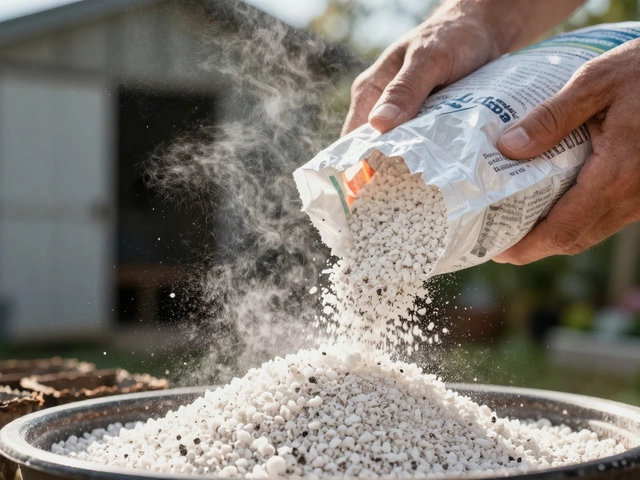
- Coarse sand or grit (not fine play sand)
Optional but helpful: crushed eggshells for calcium, and a small amount of worm castings for extra microbes. Avoid peat moss-it’s not sustainable and dries out too fast. Also skip manure unless it’s been aged for over a year. Fresh manure burns roots and smells awful.
For a 1-cubic-yard batch (enough for a 10x10 ft bed), you’ll need:
- 50% screened soil
- 30% compost
- 20% coarse sand or grit
That’s about 13.5 cubic feet of soil, 8 cubic feet of compost, and 5.5 cubic feet of sand. Scale up or down based on your space.
Step-by-step: How to mix your topsoil
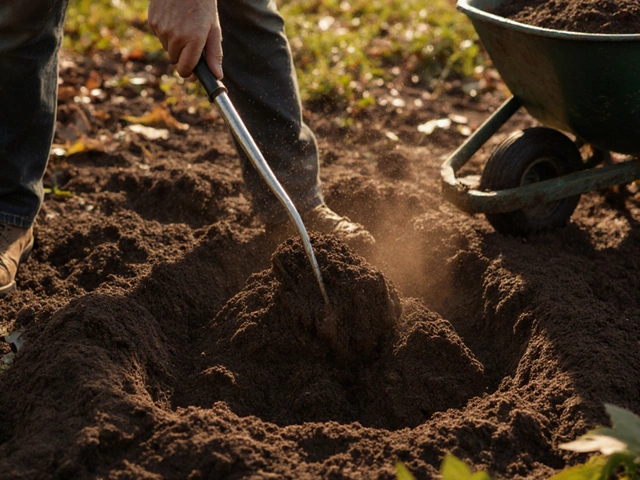
- Collect your soil-Dig from a part of your yard that’s not already planted. Avoid areas where you’ve used herbicides or seen weeds like bindweed or couch grass. Use a spade to take the top 6 inches. If it’s heavy clay or sticky sand, that’s fine-you’ll fix it in the mix.
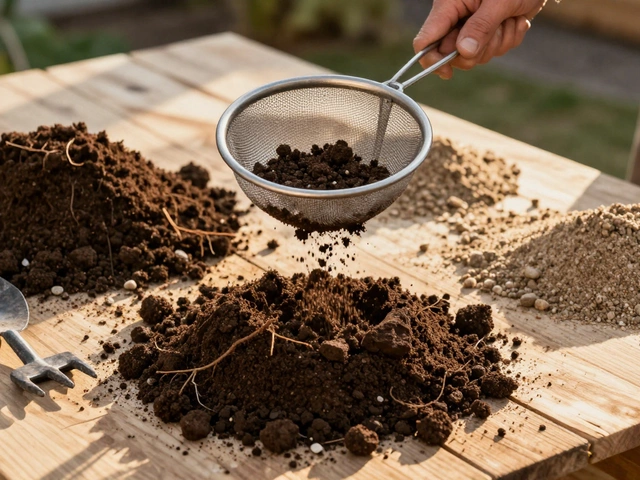
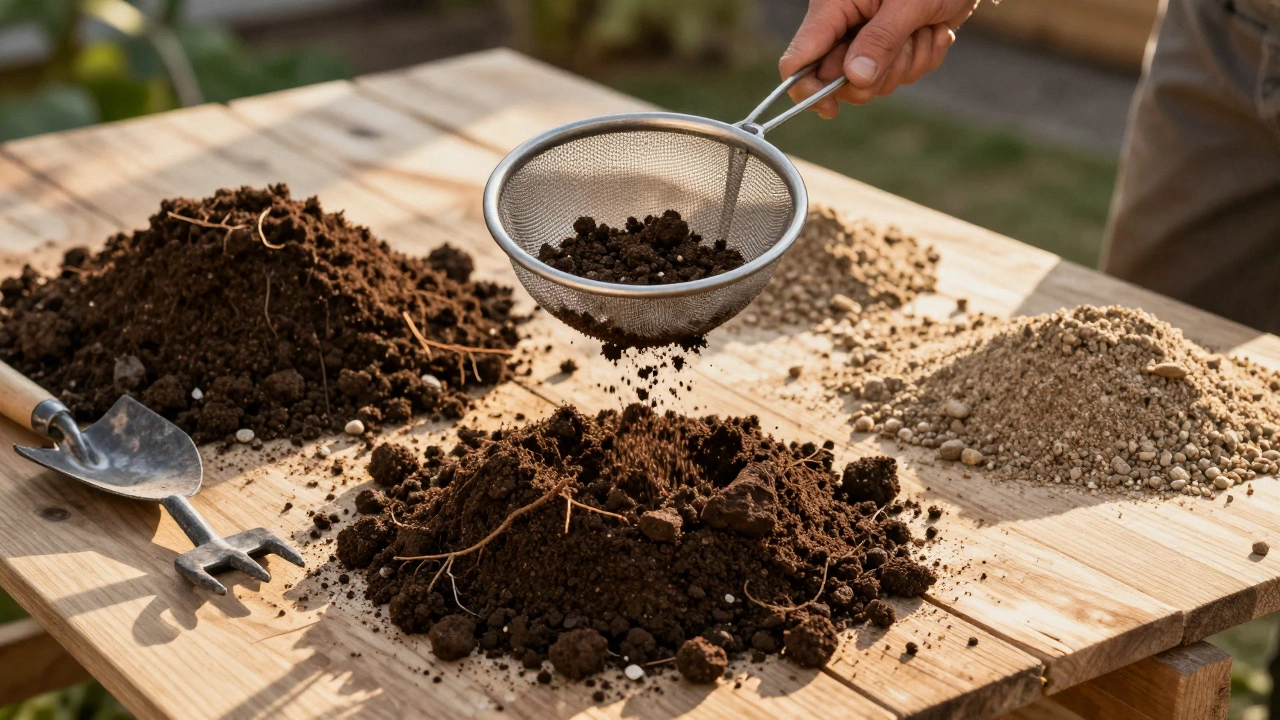
- Screen the soil-Use a 1/2-inch mesh garden sieve or hardware cloth stretched over a frame. Push the soil through with a shovel or your hands. This removes stones, roots, and debris. You’ll be surprised how much junk comes out. Keep the big bits-they’re great for drainage in raised beds.
- Prepare your compost-It must be dark, crumbly, and smell like a forest floor. If it’s still warm or smells sour, it’s not ready. Wait another month. Finished compost should pass through a 1/4-inch sieve easily.
- Get the right sand-Coarse sand, like builder’s sand or horticultural grit, is ideal. It creates air pockets. Fine sand (like beach or play sand) turns into concrete when wet. Don’t use it.
- Mix it all together-Spread the screened soil on a tarp or concrete pad. Add compost and sand. Use a garden fork to blend. Turn the pile at least 5 times. Don’t just stir the top-dig down to the bottom. You want everything evenly distributed.
- Let it rest-Cover the pile with a tarp and leave it for 2 weeks. This lets the microbes settle in and the ingredients fully integrate. Water it lightly if it dries out.
After two weeks, your topsoil is ready. Test it by squeezing a handful. It should hold its shape but crumble when you poke it. If it’s too sticky, add more sand. If it’s too loose, add more compost.
What to do with your homemade topsoil
Use it to fill raised beds, level uneven patches, or revive tired garden plots. Don’t use it to just top-dress existing plants-you’ll smother them. Instead, dig it in before planting. For new vegetable beds, lay down 4 to 6 inches and mix it into the existing soil with a fork.
It works wonders for seedlings too. Fill seed trays with a 50/50 mix of your topsoil and perlite. You’ll get stronger roots and fewer damping-off problems than with store-bought potting mix.
One gardener in Brighton, who started making her own topsoil after a bad experience with bagged soil, saw her tomato yields jump by 60% in the first season. She didn’t change anything else-just the soil.
Common mistakes to avoid
- Using fresh manure-It’s too hot. It kills seeds and burns roots. Wait until it’s aged and cool.
- Skipping the screening-Unscreened soil brings in weed seeds and rocks. You’ll spend more time weeding later.
- Using too much compost-More than 30% can make the soil hold too much water. Roots suffocate.
- Using fine sand-It compacts. You’ll end up with brick.
- Buying “topsoil” from builders’ merchants-It’s often just subsoil with no organic matter. Ask for a sample before buying.
How long does it last?
Your homemade topsoil won’t last forever, but it lasts longer than store-bought. In a vegetable bed, you’ll need to top up with compost every spring. In flower beds or lawns, it can go 2-3 years before needing a refresh. The key is to keep feeding it. Every autumn, spread a 1-inch layer of compost on top. Worms will pull it down, and your soil will keep improving.
After three years of this cycle, you’ll have soil so rich, your plants will practically grow themselves. That’s the goal-not just topsoil, but living soil.
Why this beats buying topsoil
Buying a cubic yard of topsoil costs £80-£150, depending on where you live. Making your own? If you’re already composting, it’s free. Even if you buy compost in bags, you’re still saving 70%.
And you control the quality. No hidden weed seeds. No plastic. No mystery fillers. You know exactly what’s in it because you made it.
Plus, you’re recycling nutrients. Instead of tossing kitchen scraps and grass clippings, you turn them into something valuable. That’s real sustainability.
When to make your topsoil
Best time? Late summer to early autumn. That’s when compost is usually ready, and you’ve got time to let the mix settle before spring planting. But you can make it any time-just give it at least two weeks to rest before using.
If you’re starting from scratch, begin composting now. In six months, you’ll have the key ingredient ready. Plan ahead.
Can I use leaf mold instead of compost?
Yes, but not alone. Leaf mold is great for moisture retention and structure, but it lacks nutrients. Mix it with well-rotted compost in a 50/50 ratio. That gives you the best of both: structure from leaf mold and nutrients from compost.
Is my clay soil too bad to fix?
No. Clay soil is actually full of nutrients-it just drains poorly. Your DIY topsoil mix will fix that. The coarse sand and compost open up the structure. After two seasons of annual compost top-ups, clay soil becomes workable and fertile. Many of the best gardens in Sussex started with heavy clay.
Can I make topsoil in a small space like a balcony?
Yes, but scale down. Use a large plastic bin or wheelbarrow. Mix 1 part screened soil (you can buy screened topsoil in small bags), 1 part compost, and 0.5 parts grit. Stir with a trowel. Let it sit for a week. You’ll have enough for several containers. It’s not as efficient as making a big batch, but it works.
What if I don’t have access to soil from my yard?
Buy screened topsoil from a reputable supplier-ask if it’s tested for contaminants. Then mix it 50/50 with compost and 20% grit. You’re still making your own blend, just starting with a base. Avoid anything labeled “fill dirt” or “subsoil.”
How do I know if my topsoil is good enough?
Do the squeeze test: Grab a handful, wet it slightly, and squeeze. It should form a ball that crumbles when you poke it. If it’s sticky like clay, add more sand. If it’s powdery and won’t hold shape, add more compost. You can also plant a few radish seeds in a pot of your mix. If they sprout fast and grow strong, you’ve got good soil.
Next steps
Start small. Make a batch for one raised bed. See how your plants respond. Next year, double it. Keep a notebook: note what you used, how much, and how your crops did. Over time, you’ll tweak the recipe to suit your garden.
Don’t wait for perfect conditions. Start now. Even if your compost isn’t fully ready, mix what you have. Let it rest. You’ll learn more from doing than from reading.
Your soil is alive. Treat it like a garden, not a commodity. Feed it, protect it, and it’ll feed you back-for years.