Garden Soil Restoration Planner
Step 1: Analyze Your Soil
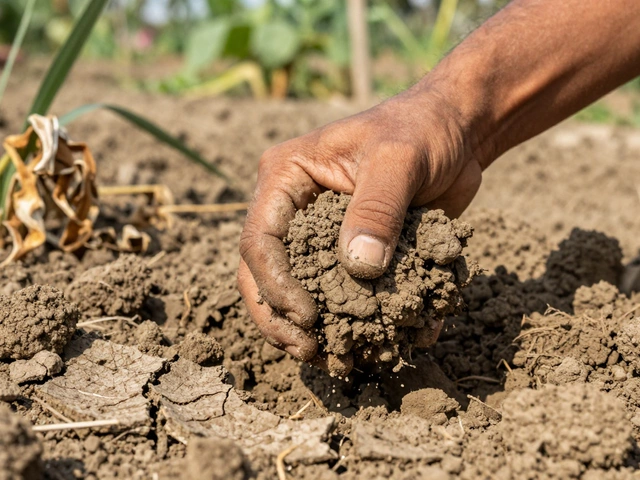
Squeeze moist soil in your hand. What happens?
| Material Needed | Est. Quantity | Purpose |
|---|
Enter your soil details on the left to get started.
Our tool will calculate exactly how much compost you need and create a custom action plan to restore your garden's health.
Look down at your garden bed. Is it hard as concrete? Does water pool on the surface instead of sinking in? If your plants are struggling despite your best efforts, the problem likely isn't your watering schedule-it's the old garden soil. Over time, soil loses its structure, nutrients, and microbial life. But here is the good news: you don't need to rip out your entire garden or buy expensive topsoil bags. You can restore that tired earth into a thriving ecosystem with patience, organic matter, and a few smart moves.
The Quick Fix: What Actually Works
Before we get into the nitty-gritty, let’s clear up a common myth. Adding chemical fertilizers won’t fix old soil. It might give your plants a temporary green boost, but it does nothing for the physical structure or long-term health. To truly restore soil, you need to rebuild its biology and physics. The golden rule is simple: add organic matter. Lots of it. Whether it’s compost, well-rotted manure, or leaf mold, these materials feed the microbes that glue soil particles together into stable aggregates.
If you want results this season, start by testing your soil pH. In Brighton, our soils tend to be slightly acidic due to rainfall leaching minerals. Most vegetables prefer a pH between 6.0 and 7.0. If yours is below 5.5, adding garden lime will help unlock existing nutrients. If it’s above 7.5, elemental sulfur or pine needles can bring it down. Getting the pH right ensures that whatever amendments you add actually become available to your plants.
Step 1: Diagnose Your Soil Type
You can’t fix what you don’t understand. Grab a handful of moist soil from about six inches deep. Squeeze it tight. If it holds its shape firmly and feels sticky when you rub it, you’re dealing with clay-heavy soil. This is common in many parts of southern England. Clay has great nutrient-holding capacity but terrible drainage and aeration. When dry, it cracks; when wet, it suffocates roots.
If the soil falls apart immediately and feels gritty, you have sandy soil. Sand drains fast-too fast. It doesn’t hold nutrients well, meaning every rain shower or irrigation washes away the food your plants need. Loam is the sweet spot: crumbly, dark, and rich. Our goal is to move toward loam regardless of where you start.
- Clay Soil: Needs aeration and organic matter to break up compaction.
- Sandy Soil: Needs organic matter to increase water retention and nutrient holding.
- Loamy Soil: Just needs regular feeding with compost to maintain balance.
Step 2: Aerate Without Destroying Structure
Many people reach for a rototiller when they see compacted soil. Stop. Tilling destroys soil structure, kills beneficial fungi, and brings weed seeds to the surface where they germinate. Instead, use a broadfork or a garden fork. Insert the tines vertically into the ground, step on them gently to penetrate deep, then rock back and forth to loosen the earth without flipping it over. This preserves the fungal networks (mycorrhizae) that help plant roots absorb phosphorus and other immobile nutrients.
For heavily compacted beds, consider core aeration. Rent a machine that pulls small plugs of soil out rather than slicing through it. Leave the cores on the surface-they’ll break down and add texture. Do this in early spring or autumn when the soil is moist but not soggy. Avoid working soil when it’s wet; you’ll create clods that take years to break down.
Step 3: Feed the Microbes with Organic Matter
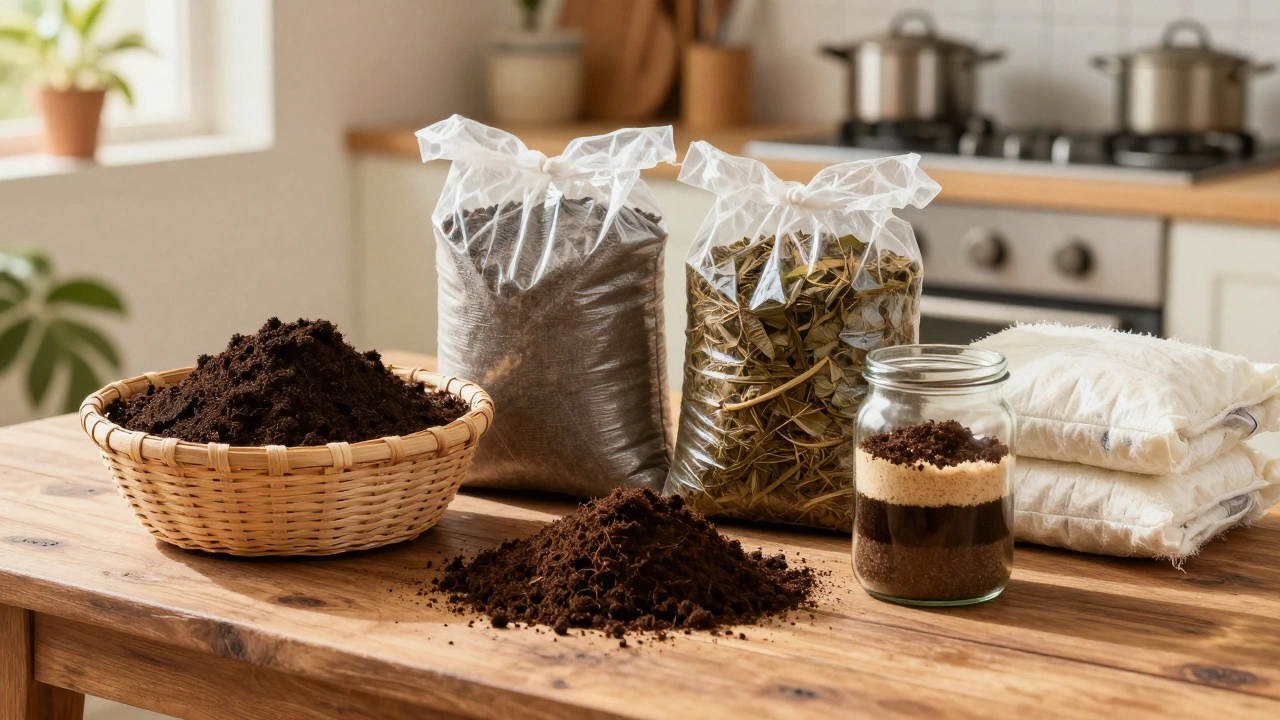
This is the heart of restoration. Add two to three inches of high-quality compost to the surface of your prepared bed. Don’t mix it in deeply unless you’re planting new shrubs or trees. Surface application mimics nature, where leaf litter decomposes on top of the forest floor. Earthworms and other organisms will pull the material down into the profile over time.
If you don’t have homemade compost, look for local sources. Many councils in East Sussex offer free or low-cost green waste compost. Ensure it’s fully matured-hot, fresh compost can burn roots and contain weed seeds. Mature compost should be dark, crumbly, and smell earthy, not sour or ammonia-like.
Other excellent amendments include:
- Well-rotted horse or cow manure: Rich in nitrogen and micronutrients. Must be aged for at least six months.
- Leaf mold: Perfect for acid-loving plants like rhododendrons and blueberries. Improves moisture retention dramatically.
- Coco coir: A sustainable alternative to peat moss. Holds eight times its weight in water and has a neutral pH.
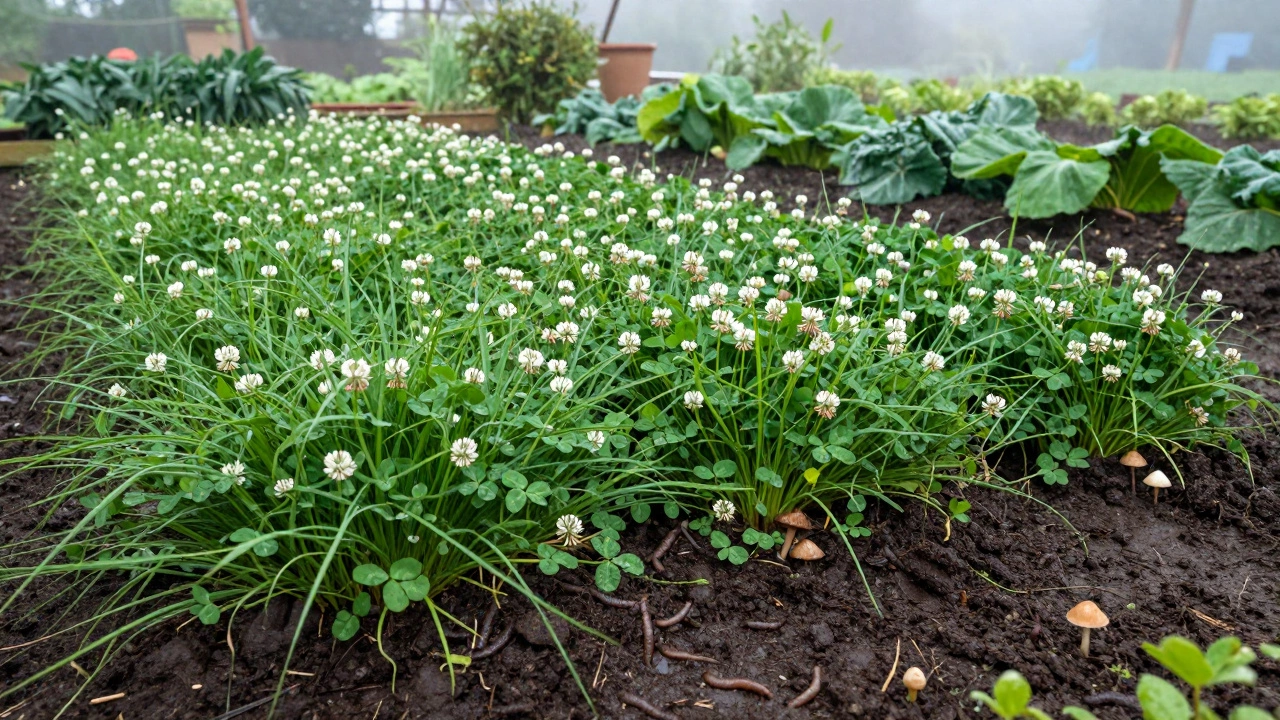
Step 4: Cover Crop and Green Manure Strategy
Never leave soil bare. Bare soil dries out, heats up, and invites weeds. Plant cover crops during off-seasons to protect and enrich the ground. For spring restoration, sow white clover or vetch. These legumes fix atmospheric nitrogen through symbiotic bacteria in their root nodules, naturally fertilizing the soil for next year’s tomatoes or brassicas.
In autumn, plant winter rye or oats. Their extensive root systems break up compaction and prevent erosion. Before they seed, cut them down and turn them into the soil or leave them as mulch. This "green manure" adds biomass and improves tilth without synthetic inputs.
| Crop | Primary Benefit | Planting Time | Termination Method |
|---|---|---|---|
| White Clover | Nitrogen fixation | Spring/Autumn | Mow before flowering |
| Winter Rye | Erosion control & biomass | Late Summer | Cut before seeding |
| Hairy Vetch | High nitrogen content | Autumn | Till in spring |
| Buckwheat | Breaks up compaction | Summer | Mow after flowering |
Step 5: Mulch to Lock in Progress
After amending and planting, apply a thick layer of mulch. Straw, shredded bark, or wood chips work well. Mulch suppresses weeds, moderates soil temperature, and slowly decomposes to feed the soil food web. In coastal areas like Brighton, wind can strip away lightweight mulches, so anchor straw with netting or use heavier wood chips around permanent plantings.
Avoid fresh grass clippings directly on stems-they mat down and rot, creating anaerobic conditions. Let them dry first or mix them into compost. Also, steer clear of plastic landscape fabrics. They block air exchange and eventually degrade into microplastics that contaminate the soil indefinitely.
Common Mistakes That Set You Back
One major error is over-amending. Dumping shovelfuls of fertilizer or even too much compost can salt out beneficial microbes and disrupt pH balance. Less is more. Another mistake is ignoring drainage. If your garden floods after rain, no amount of compost will fix standing water. Create swales, French drains, or raised beds to manage excess moisture.
Also, resist the urge to dig deeply. Shallow cultivation encourages roots to stay near the surface where they’re vulnerable to drought. Deep-rooted perennials and grasses do the heavy lifting of bioturbation better than any shovel.
Monitoring Your Success
How do you know if it’s working? Look for signs of life. Are there earthworms? Do you see mushroom fruiting bodies after rain? Is the soil darker and richer-smelling? These are indicators of a healthy microbiome. You can also perform a simple jar test: fill a mason jar one-third full with soil, add water and a drop of dish soap, shake vigorously, and let settle. After 24 hours, sand settles at the bottom, silt in the middle, clay on top, and organic matter floats. Healthy soil shows balanced layers with significant organic float.
Re-test your soil pH annually. Adjustments should be gradual. A sudden shift shocks plants and microbes. Aim for incremental improvements over seasons, not overnight miracles.
Can I restore old garden soil in one season?
Not completely. True soil restoration takes multiple growing seasons. However, you can see significant improvements in structure and plant vigor within one year by consistently adding organic matter, aerating properly, and using cover crops. Patience is key because microbial communities build up gradually.
What is the cheapest way to improve soil?
Homemade compost is the most cost-effective method. Collect kitchen scraps, yard trimmings, and fallen leaves. Layer greens (nitrogen-rich) and browns (carbon-rich) in a bin or pile. Turn it occasionally to speed decomposition. Free municipal compost programs are another excellent budget-friendly option.
Should I till my soil before adding compost?
No, avoid deep tilling. Use a garden fork to lightly loosen the top few inches if necessary, but generally, spread compost on the surface. Nature builds soil from the top down. Tilling disrupts fungal networks and accelerates carbon loss through oxidation.
How often should I test my soil pH?
Test every 1-2 years. Soil pH changes slowly unless you add large amounts of lime or sulfur. Annual testing helps you track trends and adjust amendments proactively rather than reactively when plants show deficiency symptoms.
Is peat moss good for restoring old soil?
While effective at improving moisture retention, peat moss is environmentally damaging to harvest. It releases stored carbon and destroys unique bog ecosystems. Opt for sustainable alternatives like coco coir, composted bark, or well-aged leaf mold instead.