Terrace Waterproofing Material Estimator
Enter Your Terrace Dimensions
Results
If you’ve ever planted herbs or veggies on your terrace only to find water stains on the ceiling below, you know how critical waterproofing is. A terrace roof isn’t just a flat surface-it’s the foundation of your outdoor garden. Without proper waterproofing, rain, irrigation, and even morning dew can seep through cracks, rot wooden beams, damage insulation, and ruin the lives of everyone living underneath. The good news? You don’t need a contractor or a fortune to fix it. With the right materials and a little elbow grease, you can make your terrace roof completely watertight-even if it’s old, cracked, or already showing signs of wear.
Why Your Terrace Needs Waterproofing
Most terrace roofs were never designed for soil, planters, or constant moisture. Concrete slabs crack over time. Tile grout breaks down. Drainage pipes get clogged. What starts as a small damp patch can turn into mold, structural rot, or even ceiling collapse. In Brighton, where it rains an average of 120 days a year, this isn’t a hypothetical risk-it’s a daily reality.
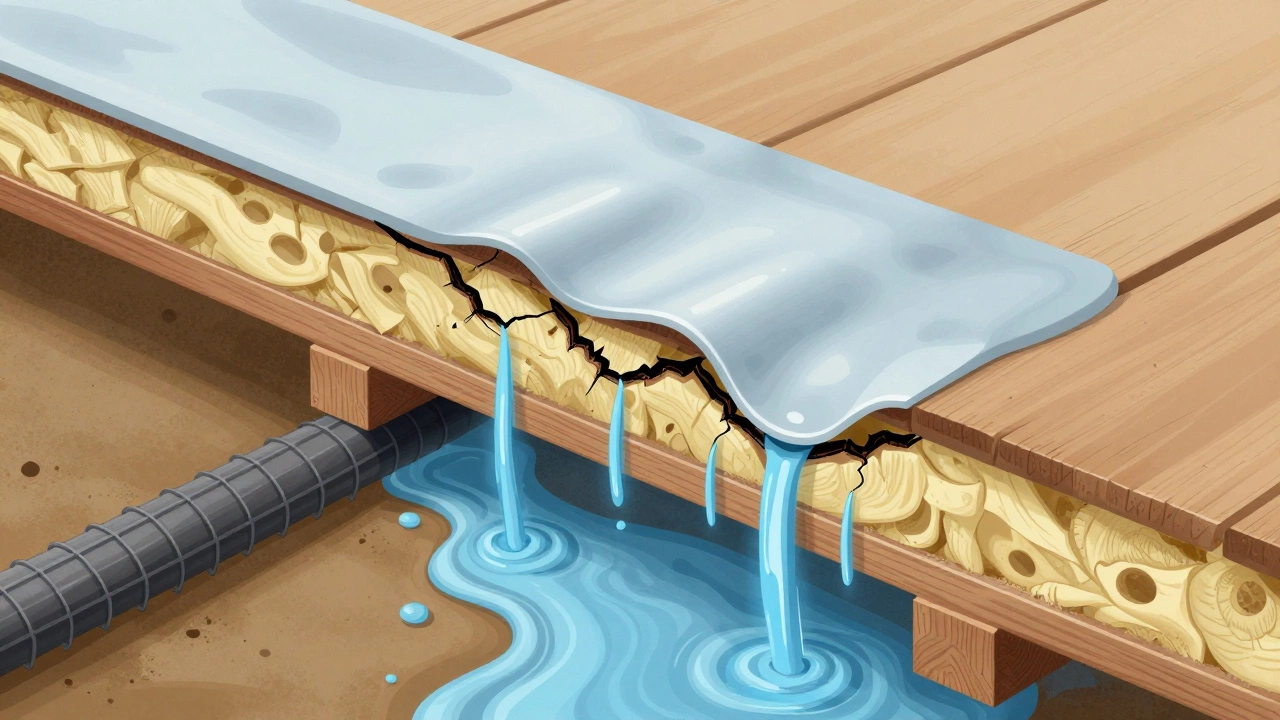
Water doesn’t just sit on the surface. It finds the tiniest gap. A hairline crack in the concrete. A loose tile. A gap around a pipe. Once water gets in, it travels sideways through capillary action, soaking insulation and weakening the structure from below. That’s why surface-level fixes like paint or sealant sprays rarely work long-term.
Step-by-Step: How to Waterproof a Terrace Roof
Here’s how to do it right, without tearing everything apart.
- Clear everything off the terrace. Remove planters, furniture, potted trees, and any debris. You need full access to the entire surface. If you have permanent planters, lift them carefully and note where they sit-those spots need extra attention.
- Inspect and repair the substrate. Look for cracks wider than 2mm. Use a wire brush to clean out loose bits. Fill cracks with a flexible polyurethane sealant like SikaFlex-221. Don’t use regular caulk-it’ll shrink and fail within months. For larger holes or spalled concrete, patch with a cement-based repair mortar like Ardex K 15.
- Prime the surface. Apply a bonding primer designed for concrete, like Sika Primer-207. This helps the waterproofing layer stick properly. Let it dry completely-usually 2 to 4 hours, depending on temperature and humidity.
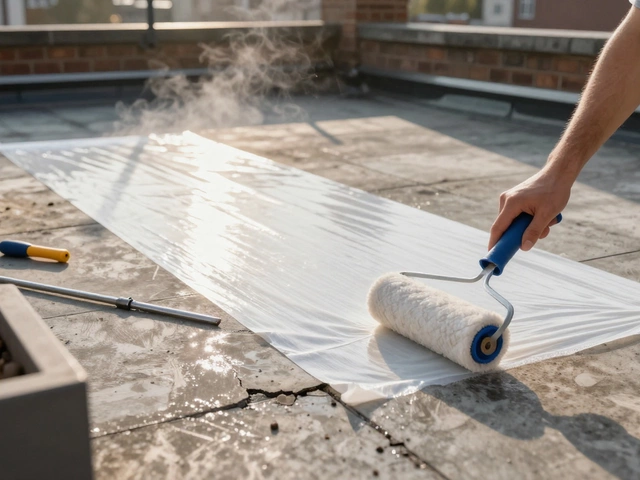
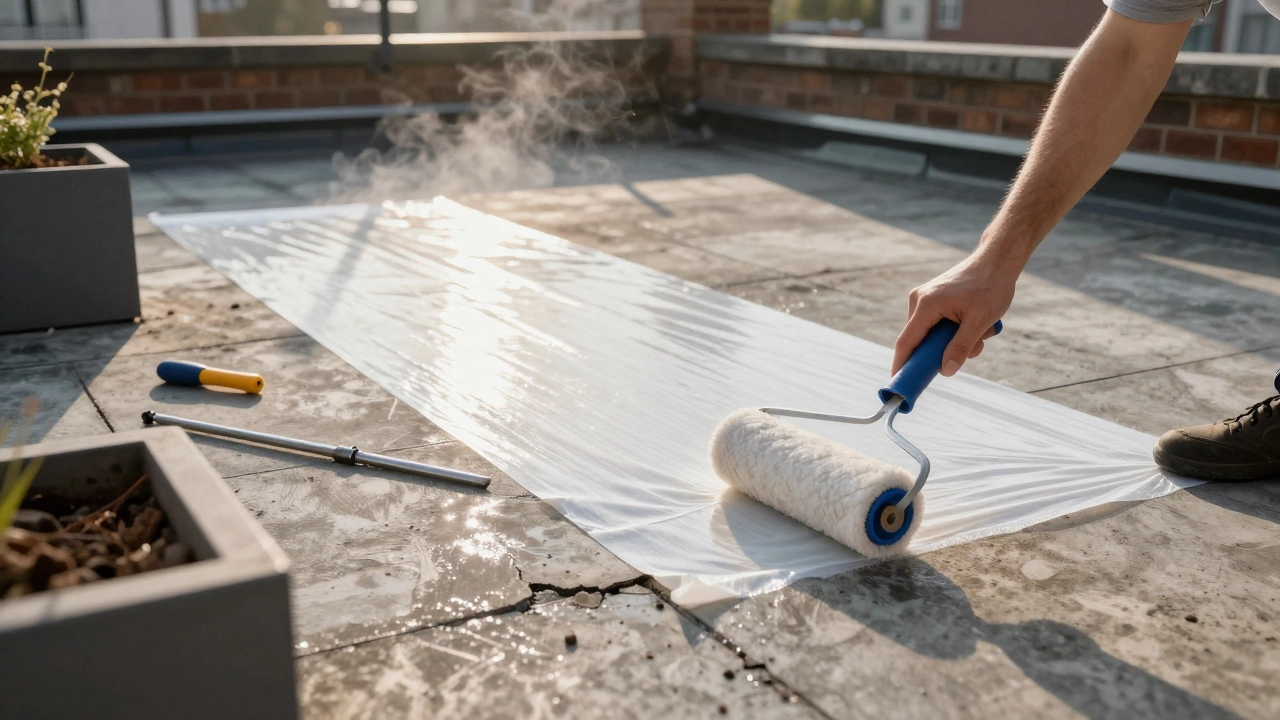
- Apply a liquid-applied membrane. This is the heart of the job. Use a high-quality, UV-resistant liquid membrane like SikaLatex or Polyguard 200. Apply it with a roller or brush in two coats, perpendicular to each other. The first coat seals pores. The second creates a continuous, flexible barrier. Wait 24 hours between coats. Don’t skimp-this layer needs to be at least 1.5mm thick.
- Reinforce high-stress areas. Around drains, pipes, and corners, lay down fiberglass mesh tape soaked in the same membrane. These spots flex the most and are the first to leak if ignored.
- Let it cure. Leave the membrane undisturbed for 48 to 72 hours. Even if it feels dry, it’s still curing chemically. Don’t walk on it. Don’t place anything on it. Rain during this time is fine-most membranes are rain-resistant after 4 hours.
- Add a protective top layer. A waterproof membrane alone isn’t enough if you’re putting planters or foot traffic on top. Lay down a 10mm layer of extruded polystyrene insulation boards or a drainage mat like Delta-MS. This protects the membrane from roots, sharp pots, and pressure. Then, add a layer of gravel or pavers to distribute weight evenly.
What Not to Do
There are plenty of shortcuts that sound smart but end in disaster.
- Don’t use tar or bitumen. It’s messy, smells awful, and becomes brittle in cold weather. In Brighton winters, it cracks like old glass.
- Don’t rely on waterproof paint. Products labeled as “waterproof paint” are usually just water-repellent. They don’t stop water from migrating through cracks.
- Don’t skip the drainage check. If your terrace drains are clogged, water will pool and find a way under your membrane no matter how good it is. Clear out leaves, dirt, and debris from drains and scuppers. Flush them with water to test flow.
- Don’t install heavy planters directly on the membrane. Even light-weight planters can puncture the membrane over time. Always use a protective layer underneath.
Best Materials for Terrace Waterproofing in 2025
Not all membranes are created equal. Here’s what works best for UK terraces:
| Product | Type | Thickness | UV Resistance | Flexibility | Cost per m² |
|---|---|---|---|---|---|
| SikaLatex | Liquid-applied | 1.5-2mm | Excellent | High | £12-£15 |
| Polyguard 200 | Liquid-applied | 1.8mm | Excellent | High | £14-£18 |
| EPDM Rubber Membrane | Sheet | 1.14mm | Excellent | Very High | £20-£25 |
| Bituminous Membrane | Sheet | 3mm | Poor | Low | £8-£12 |
For most gardeners, liquid-applied membranes like SikaLatex are the best choice. They’re easy to apply, bond tightly to concrete, and flex with temperature changes. EPDM is great for large, flat roofs but requires professional installation and is overkill for small terraces.
How Long Does It Last?
A properly installed waterproof membrane can last 15 to 25 years if maintained. The biggest killers are:
- Roots from large trees or bamboo growing through the membrane
- Foot traffic without protection
- Clogged drains causing standing water
- Using harsh chemical cleaners that break down the membrane
Check your terrace twice a year-once in spring, once in autumn. Look for bubbles, cracks, or soft spots. Clean drains. Remove any plants growing too close to edges. A quick inspection can save you thousands in repairs later.
What If Your Roof Is Already Leaking?
If water is already coming through, don’t just slap on another layer. You need to find the source.
- Use a moisture meter to trace wet spots on the ceiling below.
- Check where pipes enter the roof-this is the #1 leak point.
- Look for dark, stained areas on the terrace surface-they’re likely where water is entering.
- If the substrate is crumbling, you may need to remove the top layer and re-slab the roof. That’s a job for a pro.
For minor leaks, you can temporarily patch with a self-adhesive membrane like SikaBond Flashband. But this is only a stopgap. Full waterproofing is still required.
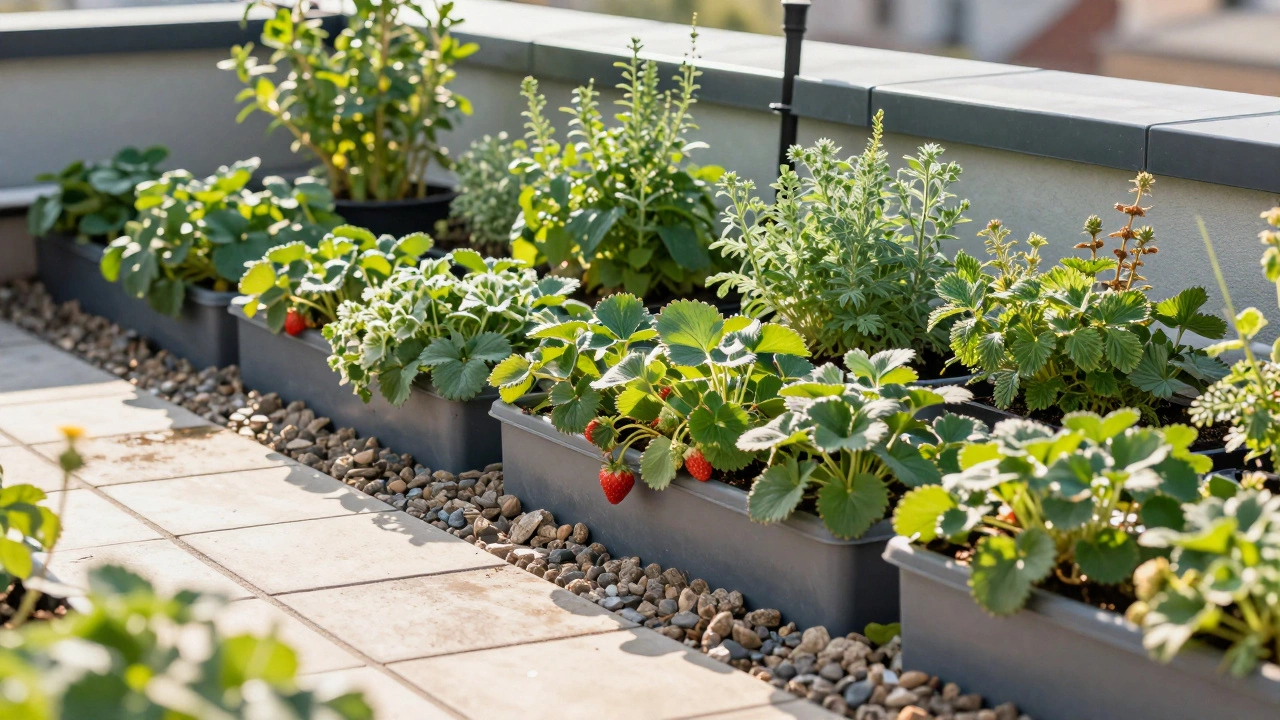
Waterproofing and Planting: What to Grow
Once your roof is sealed, you can safely grow almost anything. But some plants are easier on the membrane than others.
- Safe choices: Herbs (basil, thyme, rosemary), lettuce, strawberries, dwarf citrus, and succulents. They have shallow roots and don’t need deep soil.
- Use caution: Bamboo, large shrubs, and trees. Their roots can be aggressive. If you want them, plant in large, heavy-duty containers with root barriers.
- Avoid: Plants that need constant overwatering or sit in soggy soil. Even waterproof membranes can’t handle constant saturation.
Always use planters with drainage holes. Place them on risers or bricks to let water escape. Never let planters sit directly on the membrane.
Final Tip: Test Before You Plant
After your membrane cures, do a simple test. Hose down the entire terrace slowly, letting water run for 10 minutes. Watch the ceiling below. If you see any drips, mark the spot and reapply the membrane there. It’s better to catch a leak now than after you’ve spent weeks growing your first tomatoes.
Waterproofing a terrace roof isn’t glamorous. It’s messy, slow, and requires patience. But when you step out onto your garden in spring, dry and safe, with no worries about leaks or damage below-you’ll know it was worth every hour.
Can I waterproof my terrace myself, or do I need a professional?
You can absolutely do it yourself if you’re comfortable with basic tools and have a small to medium-sized terrace. Liquid-applied membranes are designed for DIY use. But if your roof has structural damage, deep cracks, or you’re unsure about the substrate, hire a professional. A bad job can cost more to fix later than hiring one upfront.
How much does it cost to waterproof a terrace roof?
For a typical 20m² terrace, materials cost between £250 and £400. That includes membrane, primer, sealant, mesh tape, and drainage mat. Labor isn’t needed if you do it yourself. Compare that to a professional quote of £1,000-£2,500. DIY saves you 70% or more.
Will waterproofing make my terrace hotter in summer?
Not if you add a protective layer. The membrane itself doesn’t trap heat. But dark-colored surfaces do. To keep things cool, use light-colored gravel, pavers, or reflective drainage mats. You can also add shade cloth over tall plants to reduce surface temperature.
Can I plant directly into the waterproofed surface?
No. Never plant directly into the membrane. Roots will eventually find their way through, even the tiniest ones. Always use containers with drainage holes and place them on risers or a protective layer like polystyrene boards. This keeps the membrane intact and your plants healthy.
How often should I reapply waterproofing?
You shouldn’t need to reapply if done correctly. Most high-quality membranes last 15-25 years. But inspect every year. If you see cracking, peeling, or soft spots, patch them immediately. Don’t wait for leaks. A small patch now saves a full redo later.